The Problem
The problem that we all may run into at some point is testing a RESTful API that doesn't follow acceptable design best practices. Specifically, it is acceptable practice for a RESTful POST to return a 201 status and an updated Location header pointing to the newly created resource. Unfortunately, not everyone got the message and often times a POST followed by a subsequent GET is required to request (and verify) the newly created resource. Not only does this design introduce unnecessary API requests, but it also adds marginal complexity to the lives of penetration testers.
To be more clear, this is the kind of API RESTful Post that I am concerned about as it doesn't provide immediate feedback within the response. What if we want to automate an iteration attack against various fields to see if our state-changing event produced the desired results (e.g., XSS, SSRF, etc.)?
This can be a problem considering we need to make subsequent requests to view the results of our previous Post.
So how do we deal with this? Read on.
The Toolchain
The use of Postman to create a streamlined client-side API development environment is a convenience that will change the way you as a penetration tester interacts with API endpoints. Added bonus is that more legacy protocols, such as SOAP, can also be supported via Postman considering they are essentially POSTing XML forms, so you effectively have a one-stop client for assessing endpoints.
The next item in the chain will be the all too familiar Burp Suite application proxy. The Burp macro functionality will be used to automate the "POST then GET" workflow. Additionally, we will want to have the Logger++ Burp plugin installed in order to view what is being sent and received via inherent Burp tools or external resources. Quite candidly, running Logger++ should be one of the first plugins you turn to as a penetration tester. It provides log output from most every Burp tool. It has saved me countless times in troubleshooting various application issues.
The toolchain, being Postman+Burp, is now defined but not configured quite yet. I want to deviate a bit and discuss the backend API endpoint that will be used for our contrived testing scenario. Although this is actually a production scenario that I run into often, so it isn't that contrived.
The API Endpoint
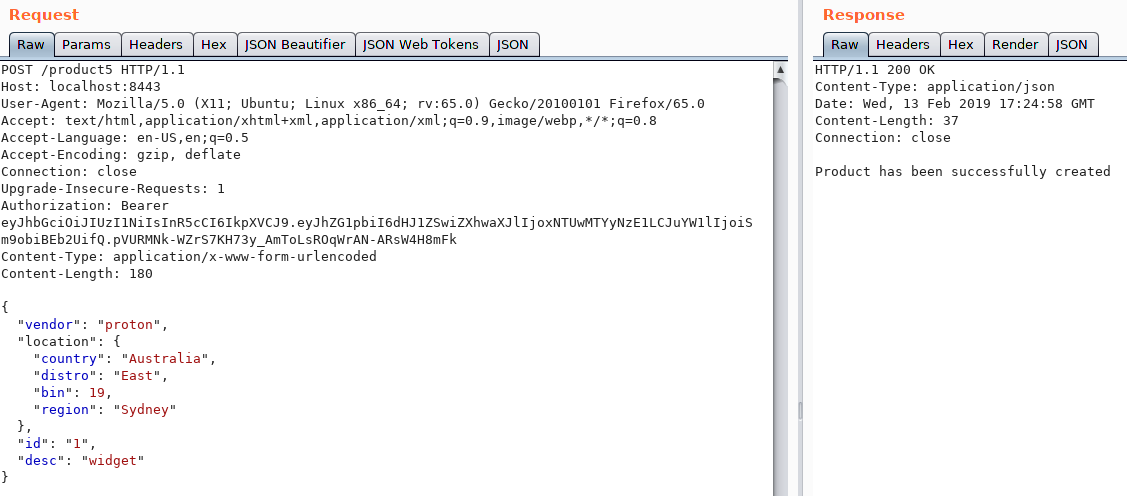
The following API will be used by our backend GO server to route, consume and provide an arbitrary response to a REST POST product creation event. The route handles are wrapped in a JWT validation middleware used to authorize our simple API transactions.
//Route Product Creation Post
router.Handle("/product{id}", jwtMiddleware.Handler(CreateProductHandler)).Methods("POST")

//CreateProductHandler creates a product
var CreateProductHandler = http.HandlerFunc(func(w http.ResponseWriter, r *http.Request) {
	params := mux.Vars(r)
	var product Product
	_ = json.NewDecoder(r.Body).Decode(&product)
	product.ID = params["id"]
	products = append(products, product)
	w.Header().Set("Content-Type", "application/json")
	w.Write([]byte("Product has been successfully created"))
})
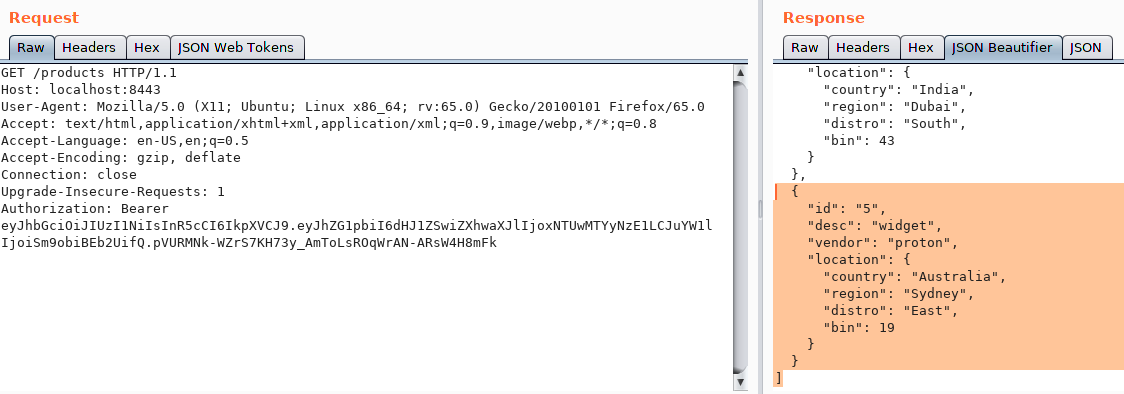
Similarly, this API will be used to call the collection of products resources. Hopefully, the results will be inclusive of the newly created product.
//Route Products Resource Get
router.Handle("/products", jwtMiddleware.Handler(GetProductsHandler)).Methods("GET")

//GetProductsHandler gets all products
var GetProductsHandler = http.HandlerFunc(func(w http.ResponseWriter, r *http.Request) {
	w.Header().Set("Content-Type", "application/json")
	json.NewEncoder(w).Encode(products)
})
Setting up Postman
When doing professional application security assessments, we always try to obtain some sort of API specification file either in the form of a native Postman json dump, a swagger file, or even curl commands pre-engagement. Essentially, anything that can be used to reduce the time to get up and running while gaining an adequate level of understanding is favorable. Otherwise, we are relegated to enumerating API collections manually, which can be difficult. Whatever transpires, you are certain to use Postman to make testing simpler.
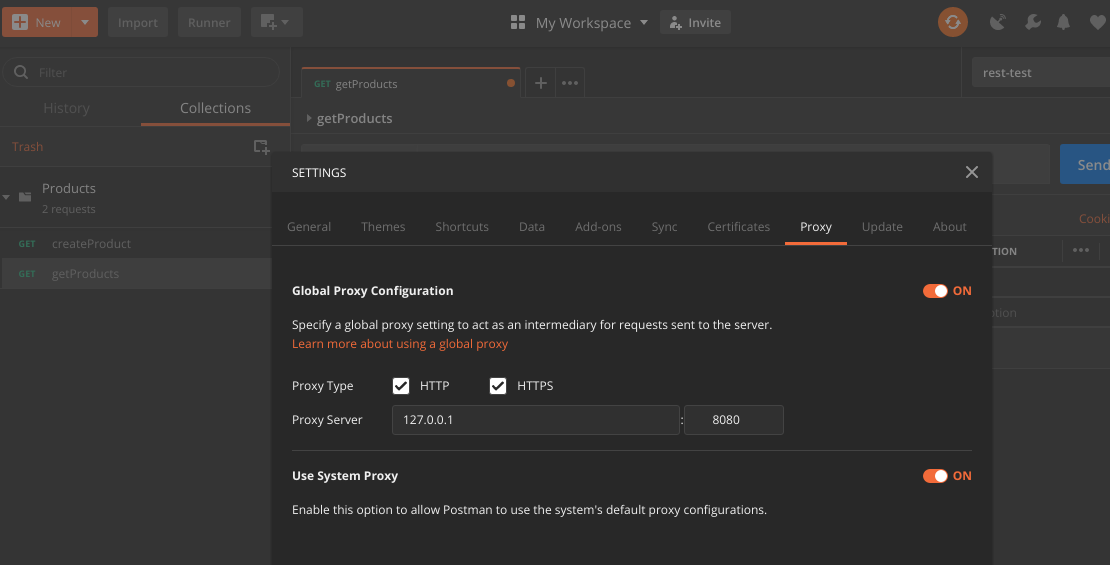
Postman is built upon Electron so expect cross-platform desktop compatibility. I use it on both OSX and Ubuntu without any issues. Anyway, once you have downloaded Postman you will want to configure it to use Burp. This is done by clicking on the wrench within the upper right hand corner, navigating to settings and then Proxy. Enter the Burp specific information - mine is set to send traffic to 127.0.0.1 on 8080 (standard Burp config).
We should walk through some of the nuances of Postman. Take a look at the following screenshot. This is the simple example but provides a glimpse into the convenience of Postman.
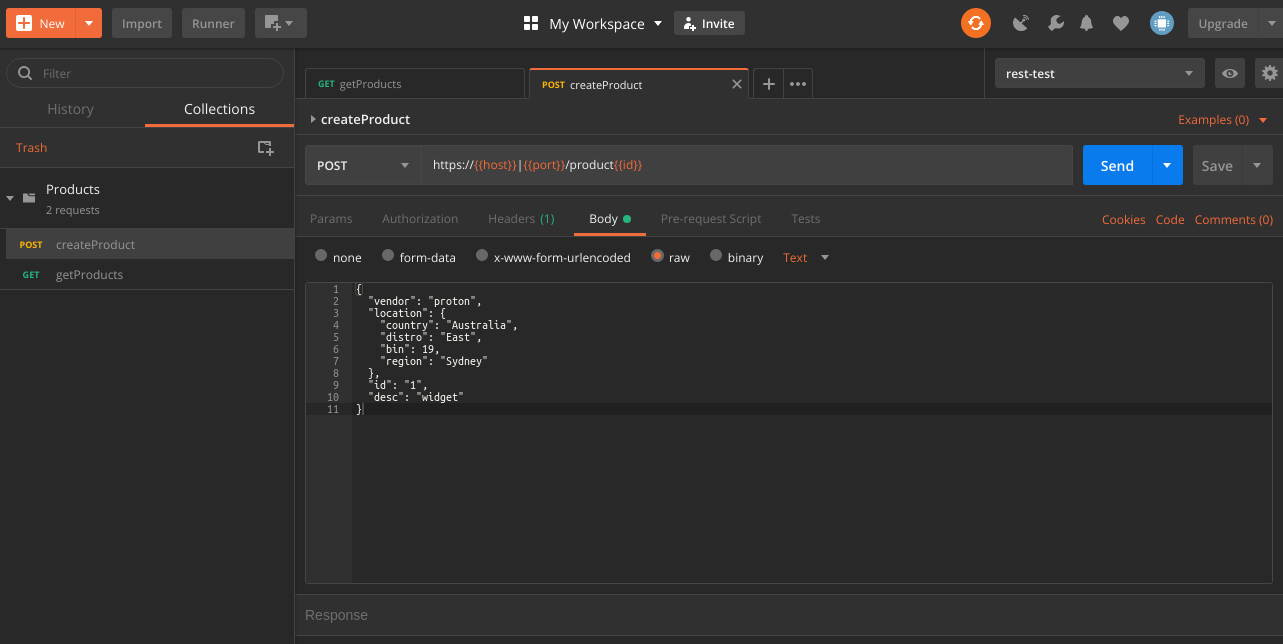
The upper left corner provides buttons to create new requests, collections and environments. Additionally, you can import a variety of pre-established datasets if a developer is so inclined to share with you. The left most pane is a means to view and edit individual requests and collections. The inner pane, or grid, provides the details associated with the actual API request. The upper right provides all of the settings.
Now you might have noticed to the left of the Send button, that there are values within {{ }}. Postman has a concept of data binding, which means that you can define variables and use the curly brackets to render the value at runtime. The power of data binding within this context of Postman is really apparent when you start to build environments.
Imagine you need to test a production, stage, or a certain build. Creating an environment and assigning all of the respective unique variables (e.g., destination URL, bearer tokens, etc.) to each environment would save a ton of time. All it would take to test would be to load the appropriate environment, and the data binding would render the appropriate values within the respective API request. The API collection specifications wouldn't require any modifications, due to the data binding. You can read more about Postman and all of its features in their official documentation.
We need to setup Burp's Macro feature to route our API calls accordingly once we have Postman setup to send requests. Let's do that now.
Setting up Burp Macros
Burp Suite macros allow us to intercept each API request, and perform either pre or post processing to the request chain using macros. It is sort of synonymous with middleware chains as applied to a route handler, for example. The following series of steps will walk you through how to setup a post-processing Burp macro.
First, we want to drop into the Project Options>Sessions tabs and go to the Macros section. Click Add to add a macro. Find the GET Request that you want to run after making your Post request. Again, we want to submit the state-changing Post and then use the Macro to subsequently make a GET request to verify if our input affected the object. Note: You will have needed to at least made one prior GET request so that it will be available within the Burp proxy history.
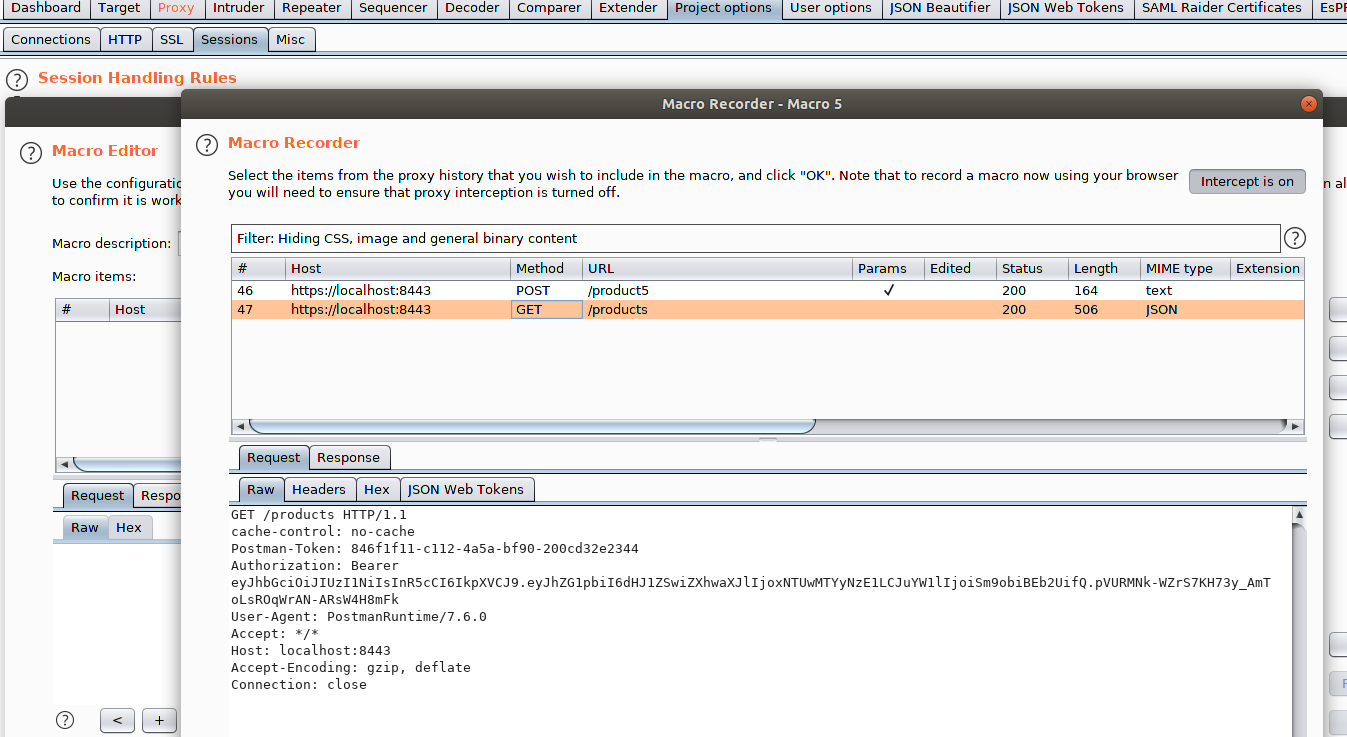
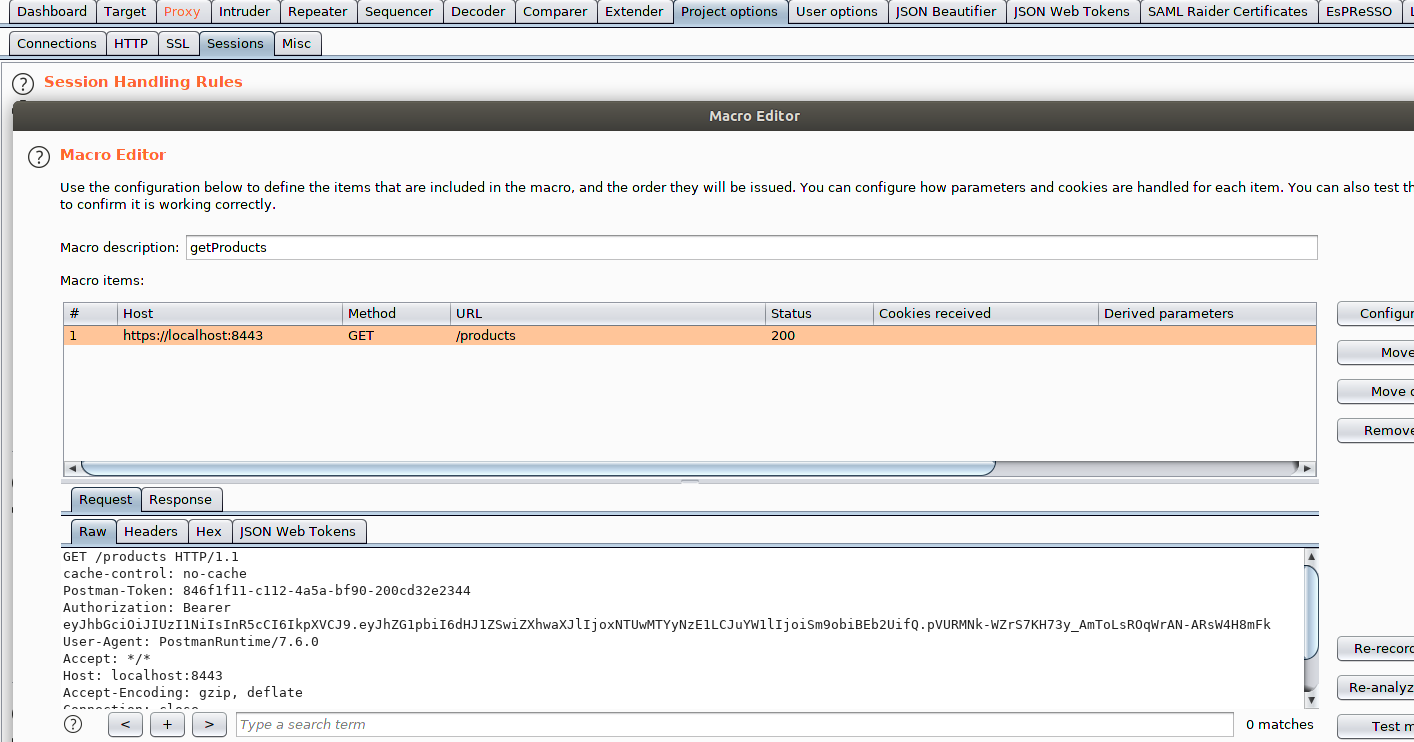
Click Ok to close that window and then name the Macro. I used something meaningful like getProducts, and again commit the changes.
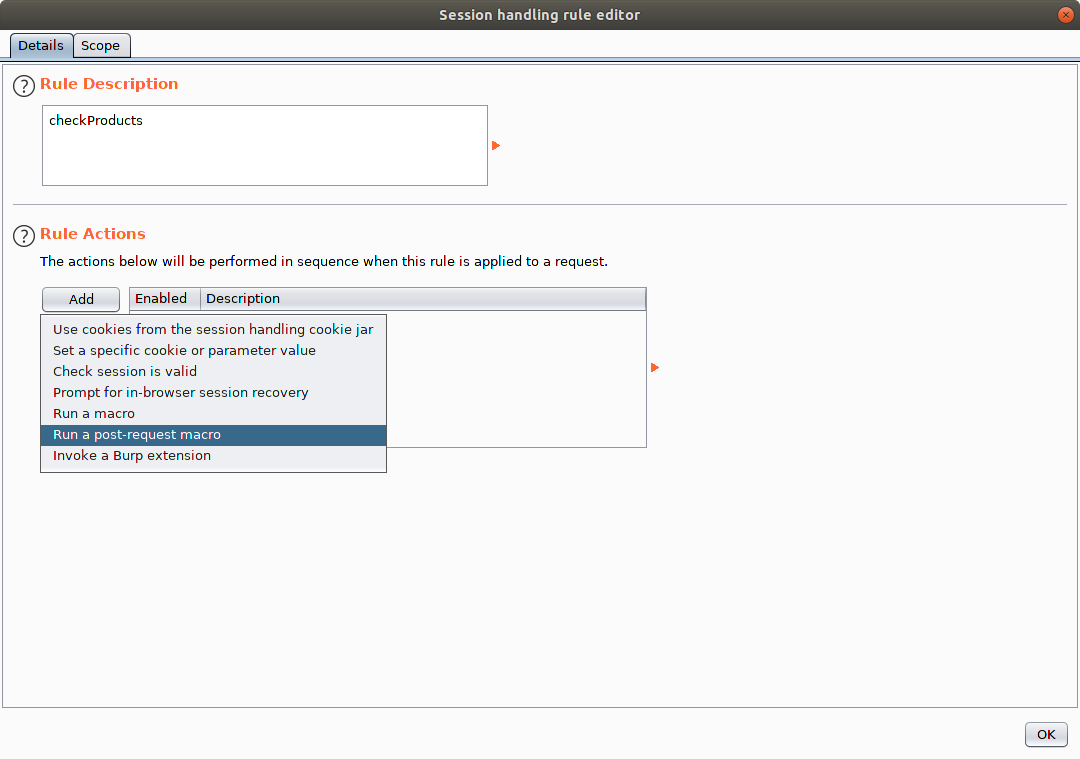
Staying within Project Options>Sessions navigate to Session Handling Rules and click Add. Add a meaningful name for the rule, here I have chosen to call mine checkProducts. Additionally, under Rule Actions you will want to select Run a post-request macro (not a literal post but think of it as rather an "after-request" macro) since we want our macro submit a GET after we make our actual Post API request. Also, as a side note, take a look at all of the interesting actions we can perform. This blog entry is only scratching the surface of the power of Burp macros.
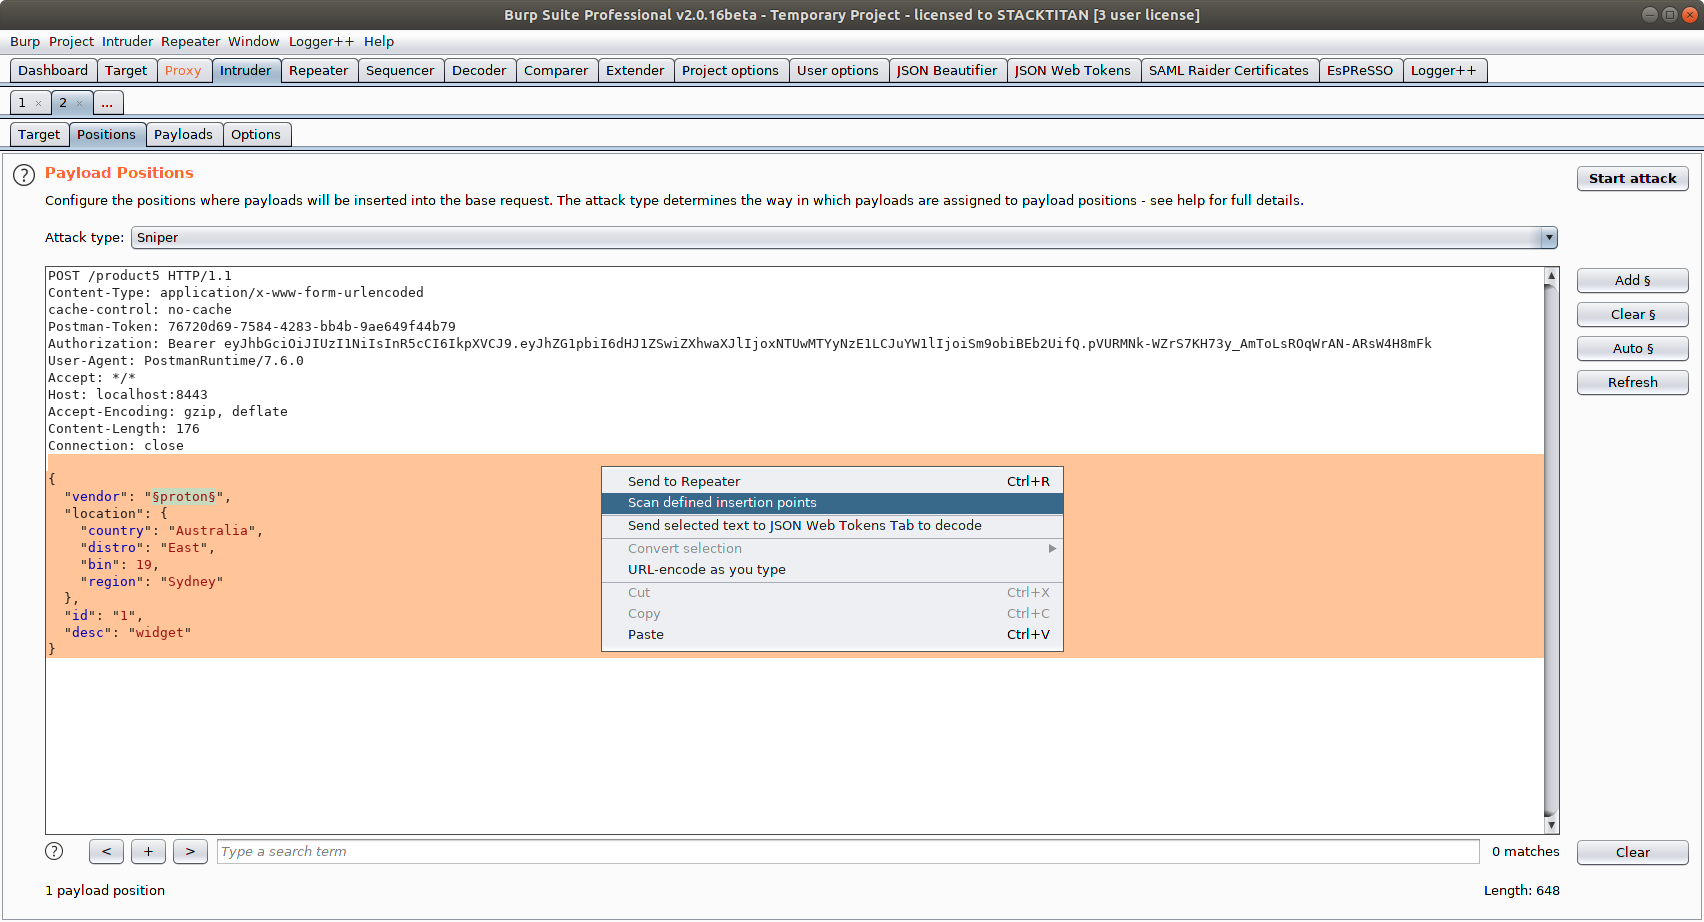
The next configuration screen will define how we want to consume the results when the macro runs. What I mean by that is imagine you want to run an Intruder scan against a selected position within the API, such as the following. Here we are interested in fuzzing the vendor's value property for one reason or another.
We want to tell Burp that we only really care about the GET response (not the POST response). To do this, uncheck the Update the first macro request... item and enable the The final response from the macro option.
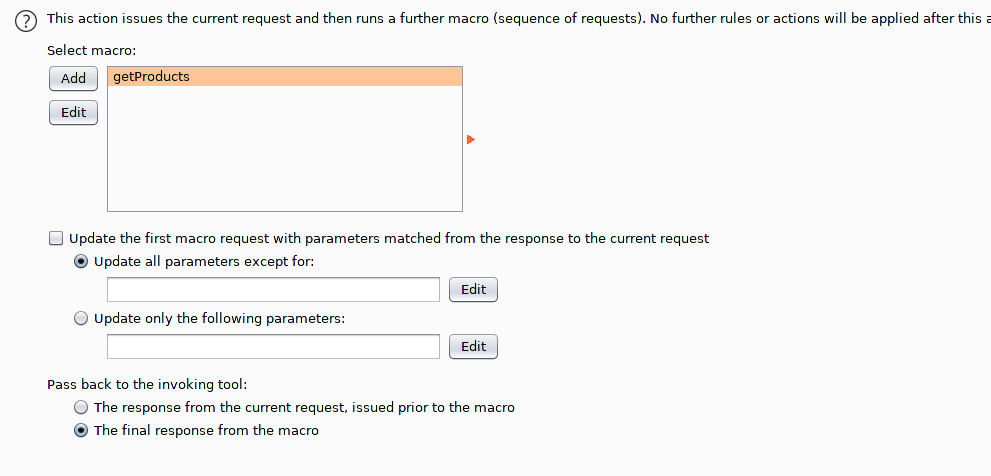
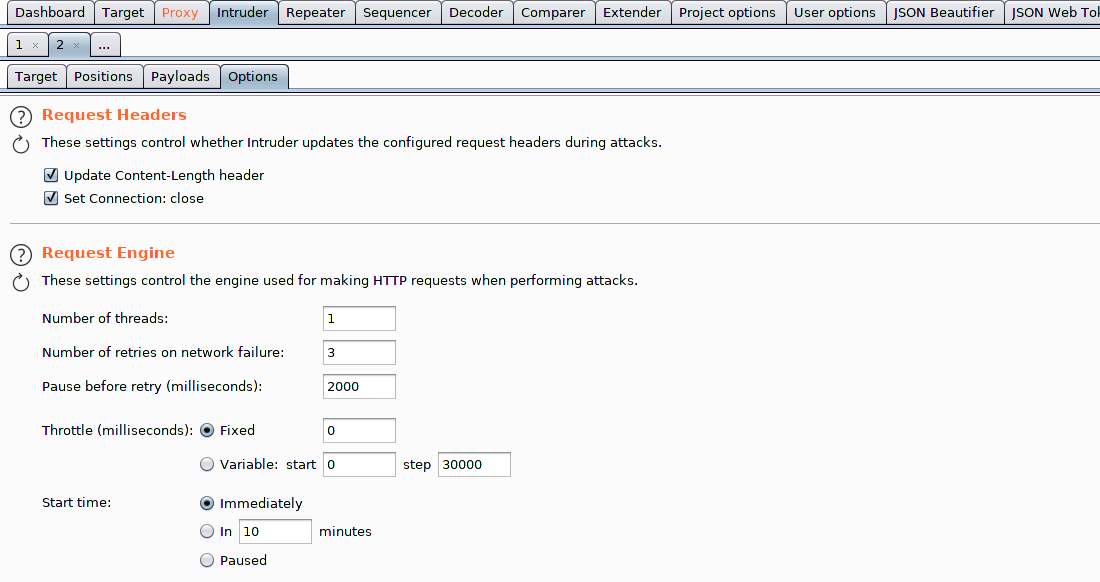
Lastly, if you are using a tool within Burp, such as Intruder, that will be spawning multiple threads then order matters. Concurrent requests to the server means we can't ensure that packets are sent and received in the correct order. Simple fix is to reduce the threads to just one (1) so that a GET request is sent immediately after our POST.
Making Sure It All Works
If we follow the testing approach of:
- making the API call, presumably using Postman or similar
- trapping the Request with Burp
- Setting up the Macro
- Attacking the API parameter using Intruder
Then, upon clicking Intruder's Start Attack we should see that the requests are made and the responses that are returned to Intruder are from our macro's subsequent GET request and not the initial POST. This is exactly what we set out to accomplish. We're basically ignoring the POST response and the GET request details.
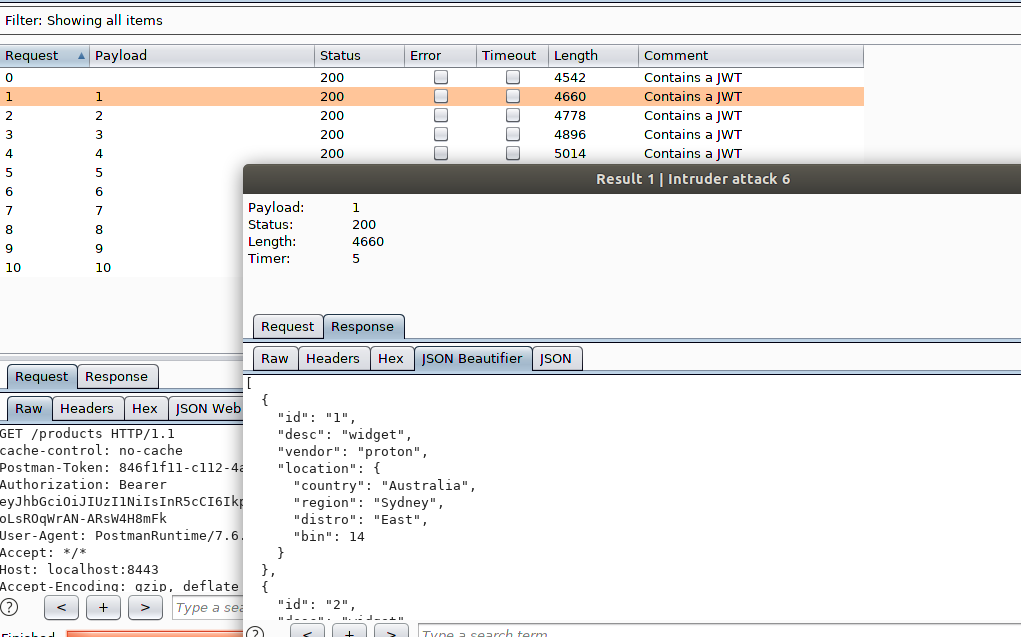
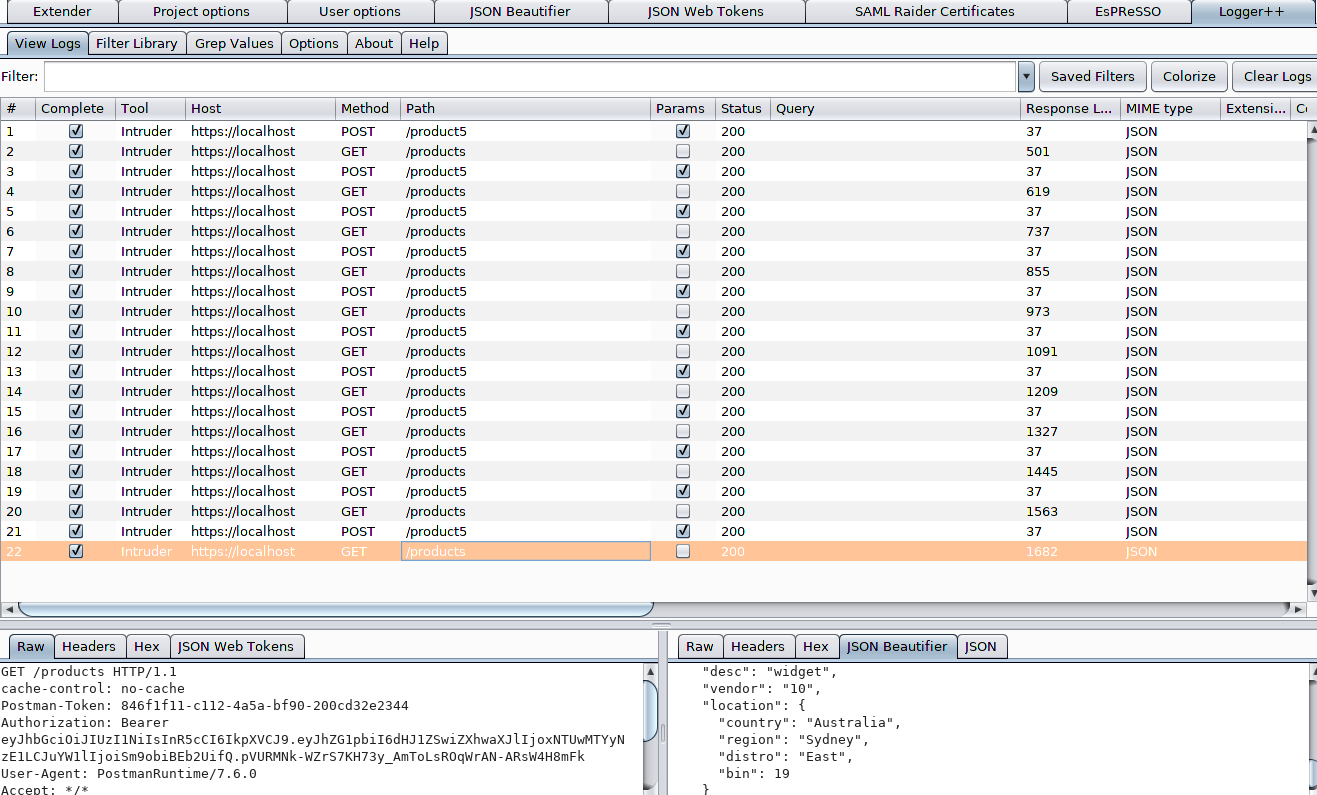
Also, if you had installed the Logger++ Burp plugin (Note: it is available in the BApp store), then you can see the exact order of operations performed by Intruder: send the POST request with our manipulated parameter, and then perform a GET to retrieve the resources to inspect the object for desired results (e.g., XSS).
Final Thoughts
STACKTITAN performs a lot of application security work, whether it is web, thick, mobile, etc. The toolchain used in this post has proven extremely convenient and effective during our assessments. Macros are powerful ways to also automate and manipulate session information, or to transfer parameter values (think contexts in middleware if you are familiar) from one request to the next.
In our example, we could have added a macro that makes a subsequent DELETE call after the GET, in order to immediately remove the object created during the initial POST. This would provide a means to prevent contamination and pollution of the backend datastore.
As with all of our posts, it serves as documentation for us, and we also hope this helps others throughout their application testing. The path is always forward.