"Physical access is total access". This is what my instructor at the Marine Corps Communications and Electronics School told us as he demonstrated the password recovery procedure on a Cisco Catalyst 2960 switch. We had just completed most of the curriculum learning about networking concepts, configuring Cisco equipment, deploying Windows Server operating systems, and more to set up communications. At this point, he was driving home the importance of keeping equipment secure and out of the hands of an adversary. For the uninitiated, gaining access to certain models of Cisco switches and routers without credentials is merely a means of power cycling the device, holding the mode button, and issuing a few commands.
Fast forward a few years and I'm on my first engagement attempting to access a secure, multi-tenant facility completely on my own with minimal training. I perform a few basic checks; how many entrances/exits are there? Is anything aside from the lobby unlocked? Of the 3 or 4 doors on the outside of the building, none were unlocked aside from the lobby entrance. This was also early 2021 so there were a total of 3 vehicles in the parking lot, no opportunity to tailgate. That ended up being the end of my ideas and the end of the assessment. I walked away feeling like I hadn't given the client any value.
Now I've completed the Practical Physical Exploitation course and can say without a doubt I'm ready and equipped to breach some facilities. This course really has everything you need with no fluff.
Course Structure and Pre-Reqs
The Practical Physical Exploitation course, taught by Travis Weathers of Optiv and Ralph May of Black Hills Information Security, is exactly as advertised. Practical. As such, everything is set to mimic an efficiently run, real-world engagement. They spend very little time on theory and lots on hands-on learning. The course is 3 days long, with the first containing the most instruction and the last being the course capstone. Here's a quick breakdown:
- Day 1 - Introductions, in-class instruction, PEAK, recon
- Day 2 - Recon pt. 2, Practical arts and crafts, night ops
- Day 3 - More recon, CAPEX, after action report
There are a few things you will need to have for the course to ensure you get the full hands-on experience.
- A laptop where you can run proxmark either in a VM or natively
- A vehicle that can fit at least two other people and some equipment
- Some kind of mobile hot-spot. Whether this is directly off your phone or a puck, is up to you
It's All Business
The first day contains the most presentations. After this, very little time is spent looking at slides. One of the key aspects the instructors focus on during day 1 is the business side of engagements:
- Scoping and selling
- Acquiring appropriate authorization
- Client communication
- Reporting
Though not a foreign topic for most pentesters, red teamers, or other security professionals, Physical Penetration assessments have a unique perspective. If you're struggling to sell these assessments, or just getting started, this section of the course makes all the difference.
After you're done discussing the business aspects of engagements, you learn about practical remote recon. What's out there, publicly available, about a business? There are some key points in this section that are the foundation of your success now and for the rest of your career as a physical pentester. From here, you're introduced to PPE's PEAK equipment. After you're briefed on these tools of the trade, you begin your first real-world exercise.
Course Handouts
Aside from the practical skills and lessons learned, one of the things you walk away from this course with is a handful of document templates:
- Scoping questionnaire
- Statement of Work
- Kick-off call notes
- Authorization Letter & questionnaire
- Report template
- Badge templates
You also get access to PPE's student portal, where you'll be able to review all course material.
Physical Exploitation and Access Kit (PEAK)
As part of this course, your team, or if you're like my small class of 3, each individual, will receive a PEAK during day 1 (to be returned at the end of the course). This is the Physical Exploitation and Access Kit. It contains everything you need to conduct an engagement with the exception of a computer and smart phone. If you've looked at one of these kits before, the variant provided is the full kit that contains the surveillance and stealth equipment. By far my favorite piece of equipment was the Nikon P900 with it's long range zoom lens.
If you're staying in a hotel or somewhere else with ADA compliant door handles, I highly recommend practicing with the under door tool. For those interested, they do sell these kits here.
Quick tips for success
While the instructors give you everything you need to succeed, there are a few things you can do to make everything go smoother:
- Pay attention to the little details
- Memorize the differences in badge readers
- Elect a team captain. The team captain should divide work among the team and keep track of objectives, client communications, and who has what gear during an op. This will help ensure no overlap occurs without missing anything.
With this hefty introduction completed, let's move on to what this is all about, what you do in the class.
Day 1
As mentioned previously, day 1 is where you'll look at slides the most. Once you've been briefed on the business aspect of physical security engagements, the fun starts. The rest of day 1 is mostly hands on with debriefing after practical exercises.
Remote Reconnaissance
Your first exercise is performing remote reconnaissance against a fictitious company. In this stage, you'll want to gather as much information about the target from online sources. Primary areas you're concerned with are the building and employee online presence.
When searching for an address online, there are tons of resources that will provide additional information about a commercial space. It's a good idea to use multiple sources here, especially when looking at street views of buildings. Speaking of street view, this is your first opportunity to get eyes on cameras.
Employee presence comes to general social media intelligence, or SOCMINT, practices. What you're looking for here is names, roles, and have they posted their badge online somewhere. Real world tip here: people, especially new hires, love posting their badges on Instagram and TikTok.
On-Site Reconnaissance
Walking through the next phase of the engagement, you're tasked with performing some on-site reconnaissance. At this phase, you're increasing operational risk. Everything you do from here could burn the op. You need to keep a low profile.
There are two primary types of on-site recon: mobile and close-proximity. Given the risky nature of on-site recon, close-proximity should be used only as a last resort. This is where you would walk the premises and gather necessary information. Our team did not do this, however the instructors did some close-proximity recon and shared results during the debrief.
During mobile recon, you're again faced with two choices: dynamic or static. With dynamic mobile recon, you're continuously on the move. Drive around the campus at a slow, but reasonable speed to capture video and/or images. Depart and review, and if needed, return after an extended cool-down period. Regarding static mobile recon, it's exactly what it sounds like. Park the vehicle and take your video and images from that position, being careful not to attract attention.
Making Ralphs
After you've debriefed the third exercise, it's time for some arts and crafts. You'll get hands-on practice with making badges. This is done with a blank badge, silhouette paper, packing tape, a hole punch, and patience. You'll probably mess up a few times, but Ralph has plenty pictures to spare.

After you've made your Ralphs and perfected the art of badge-making, you'll be briefed on some additional intel the team has gathered. The team will be informed that [REDACTED] employees often visit a local [REDACTED] before heading to work. They've been spotted with their badges visible. Once you've been provided the location, I recommend going with your team to plan out the next morning's operation.
Day 2
This is the longest day of the course, however, it's arguably the most fun. You start off the morning trying not to look suspicious at the breakfast location. Your team should be set up to capture video and images to get a clear reference image of the [REDACTED] employee badge. Then you'll need to modify the template to match this image, save it to a thumb drive, and print on silhouette paper at FedEx. You'll take this back to class and be briefed on some additional intel that was gathered. [REDACTED] employees have been identified regularly going to [REDACTED] for lunch. This is your chance to pull data from the badges to clone them.
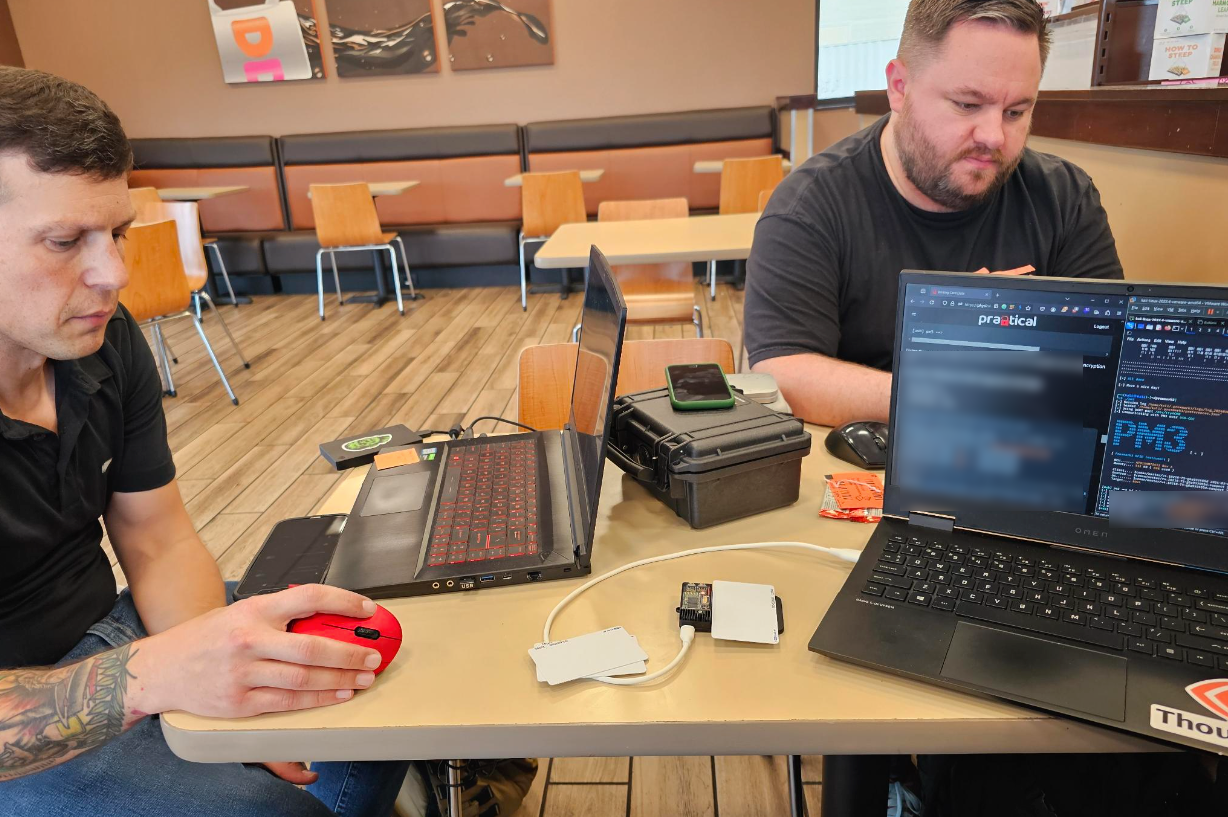
Badge Cloning
As I've noted above, you'll want to make sure you paid attention to what type of badge readers the organization has deployed when performing your recon. This will determine what kind of reader you'll need to carry for cloning. Carry the wrong reader, and you won't get any data. You'll be briefly introduced to operating the readers, web interface, and proxmark in the classroom prior to departing. Once you're comfortable, it's time to head to the lunch location.
Everyone has their own approach to getting badge reads, whether it be navigating a tight space, using team members to herd, or going through a line to get somewhere. Directly approaching someone to ask for directions is perfectly valid as well, just be aware of the size of the target organization. In a real engagement, you need to consider the likelihood that you could compromise the operation taking this approach. However you decide to tackle this challenge, you need at least two badge reads to ensure you have adequate data - "Two is one and one is none".

With your newly acquired badge data, it'll be time to return to class, and make a working badge for [REDACTED]. The instructors have a test reader set up so that you can verify you've done this correctly, and you'll be given a chance to compare your badge with the "real" badge for [REDACTED].
Once everyone has had a chance to test and compare badges, you're done with this first fictitious company. It's time to review some methodology, and be briefed on your final target.
Final Target, Night Ops, Bonus Points
During this brief, you'll receive paperwork to sign and review as you are now targeting a real company, under a fictitious name for purposes of the course. You'll receive the scope and objectives, and go through a mock-up of normal engagement procedures starting with a kick-off call. The instructors will then disclose the location of the facility and provide you with similar intel to the practice target about a common breakfast stop for employees. You're given a buffer window before on-site reconnaissance is authorized. During this time I recommend traveling to the breakfast location, performing remote recon on the target, and formulating a plan for next steps.
Once you've acquired adequate information, it's time to perform on-site reconnaissance. At this point, you may have realized it's helpful to have more than one vehicle at your disposal. Our team performed two rounds of dynamic mobile reconnaissance approximately 20 minutes apart. From there, one team member dropped myself and another team member at an off-site location where we walked to perform close-proximity mobile recon. If you take this route, this is your first chance to achieve a bonus objective and garner additional information to complete your remote recon. Just make sure you communicate with the "client" that you're preparing to do this.

Day 3
The last day of the course consists of the CAPEX and debrief. This is where you will use everything you've learned up to this point to perform a facility breach and achieve any bonus objectives that are still left.
Lessons Learned
Have you noticed how I've mentioned having the correct badge reader, taking note of the technologies in use, and paying attention to little details several times so far? At the breakfast location for the CAPEX target, our team was equipped with the wrong readers. However, some adaptability went a long way and we got the necessary reads to clone badges for the target company.
Once inside, I split off to tackle a bonus objective while the other two targeted the primary objective. This took longer than expected and we were getting frustrated with our designated tasks, so we switched. This is what led to our success. If you're struggling, let someone else take the reins.
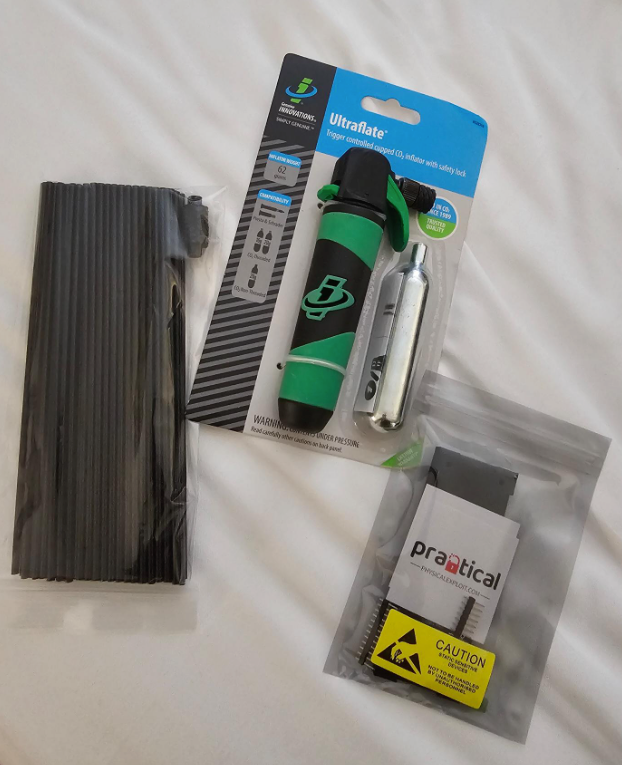
Final Thoughts
The Practical Physical Exploitation course is well worth the time, money, and effort. The instructors have built an excellent offering that is a true "zero to hero" style course that not only new pentesters, but seasoned professionals would both gain value from attending. Beyond the skills gained, you also get a certificate of completion and some gear. Specifically, you receive a REX gun, nozzle adapters, nozzles, a Doppelgänger breakout board, and some stickers.